Hiệu ứng Hover siêu đẹp cho CSS3 button
Bizfly Cloud sẽ giới thiệu tới bạn danh sách những hiệu ứng Hover siêu đẹp và khá đơn giản mà bạn có thể áp dụng cho các button trên trang web. Sử dụng những mẫu button được tạo ra bằng hiệu ứng Hover sẽ làm cho trang web của bạn càng sinh động và thu hút người truy cập hơn.
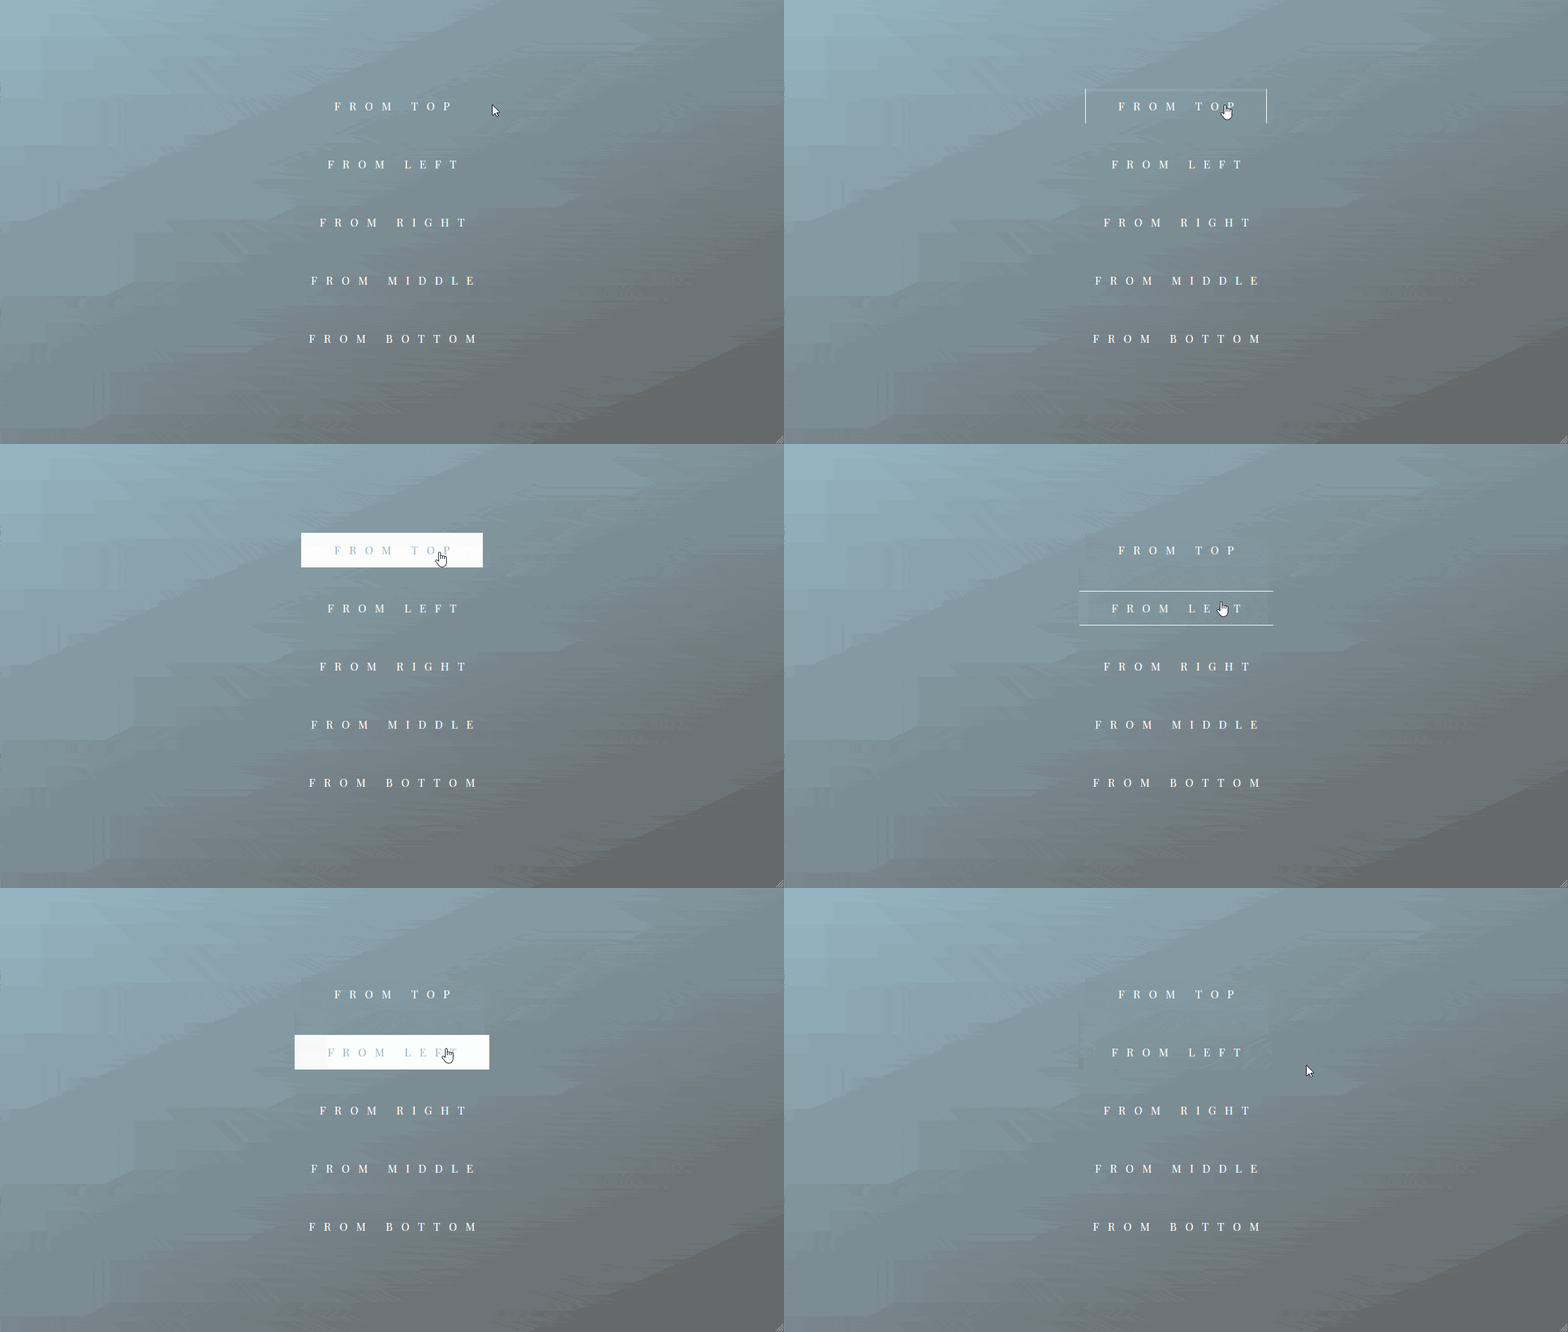
Buttons cách điệu với hiệu ứng Direction hover
Hiệu ứng Direction hover giúp bạn thổi hồn cho button đơn giản thêm sinh động nhờ sự chuyển động của nền chữ và viền button.
Ví dụ:
HTML:
<div class="btn from-top">From Top</div>
<div class="btn from-left">From Left</div>
<div class="btn from-right">From Right</div>
<div class="btn from-center">From Center</div>
<div class="btn from-bottom">From Bottom</div>
CSS:
/* ~~~~~~~ INIT. BTN ~~~~~~~ */
.btn {
position: relative;
padding: 1.4rem 4.2rem;
padding-right: 3.1rem;
font-size: 1.4rem;
color: var(--inv);
letter-spacing: 1.1rem;
text-transform: uppercase;
transition: all 500ms cubic-bezier(0.77, 0, 0.175, 1);
cursor: pointer;
user-select: none;
}
.btn:before, .btn:after {
content: '';
position: absolute;
transition: inherit;
z-index: -1;
}
.btn:hover {
color: var(--def);
transition-delay: .5s;
}
.btn:hover:before {
transition-delay: 0s;
}
.btn:hover:after {
background: var(--inv);
transition-delay: .35s;
}
/* From Top */
.from-top:before,
.from-top:after {
left: 0;
height: 0;
width: 100%;
}
.from-top:before {
bottom: 0;
border: 1px solid var(--inv);
border-top: 0;
border-bottom: 0;
}
.from-top:after {
top: 0;
height: 0;
}
.from-top:hover:before,
.from-top:hover:after {
height: 100%;
}
/* From Left */
.from-left:before,
.from-left:after {
top: 0;
width: 0;
height: 100%;
}
.from-left:before {
right: 0;
border: 1px solid var(--inv);
border-left: 0;
border-right: 0;
}
.from-left:after {
left: 0;
}
.from-left:hover:before,
.from-left:hover:after {
width: 100%;
}
/* From Right */
.from-right:before,
.from-right:after {
top: 0;
width: 0;
height: 100%;
}
.from-right:before {
left: 0;
border: 1px solid var(--inv);
border-left: 0;
border-right: 0;
}
.from-right:after {
right: 0;
}
.from-right:hover:before,
.from-right:hover:after {
width: 100%;
}
/* From center */
.from-center:before {
top: 0;
left: 50%;
height: 100%;
width: 0;
border: 1px solid var(--inv);
border-left: 0;
border-right: 0;
}
.from-center:after {
bottom: 0;
left: 0;
height: 0;
width: 100%;
background: var(--inv);
}
.from-center:hover:before {
left: 0;
width: 100%;
}
.from-center:hover:after {
top: 0;
height: 100%;
}
/* From Bottom */
.from-bottom:before,
.from-bottom:after {
left: 0;
height: 0;
width: 100%;
}
.from-bottom:before {
top: 0;
border: 1px solid var(--inv);
border-top: 0;
border-bottom: 0;
}
.from-bottom:after {
bottom: 0;
height: 0;
}
.from-bottom:hover:before,
.from-bottom:hover:after {
height: 100%;
}
/* ~~~~~~~~~~~~ GLOBAL SETTINGS ~~~~~~~~~~~~ */
*, *:before, *:after {
box-sizing: border-box;
}
body {
--def: #96B7C4;
--inv: #fff;
display: flex;
justify-content: center;
align-items: center;
flex-direction: column;
height: 100vh;
width: 100%;
background-image: linear-gradient(-25deg, #616161 0%, #96B7C4 100%);
}
html {
font-size: 12px;
font-family: 'Playfair Display', serif;
}
div {margin-bottom: 3rem;}
div:last-child {margin-bottom: 0;}
- Hiệu ứng viền chuyển động vòng quanh button
Đây là một hiệu ứng khá là thú vị và đẹp mắt mà bạn có thể sử dụng cho button của mình để làm mới mẻ giao diện của trang web.

Để có được hiệu ứng như hình trên bạn tham khảo các bước dưới đây.
HTML
<div id="main">
<div class="container">
<div class="row">
<div class="block col-md-2">
<a href="#" class="btn btn-1 color-green">
<svg>
<rect x="0" y="0" fill="none" width="100%" height="100%"/>
</svg>
Hover
</a>
</div>
<div class="block col-md-2">
<a href="#" class="btn btn-1 color-blue">
<svg>
<rect x="0" y="0" fill="none" width="100%" height="100%"/>
</svg>
Hover
</a>
</div>
</div>
</div>
</div>
Phần CSS chung
body {
background-color: #222;
}
#main {
margin-top: 200px;
}
.btn {
color: #fff;
cursor: pointer;
display: inline-block;
font-size:16px;
font-weight: 400;
line-height: 36px;
margin: 0 0 2em;
max-width: 160px;
position: relative;
text-decoration: none;
text-transform: uppercase;
width: 100%;
}
CSS
.btn-1 {
font-weight: 100;
transition: all .25s;
svg {
height: 45px;
left: 0;
position: absolute;
top: 0;
width: 100%;
}
rect {
fill: none;
stroke: #fff;
stroke-width: 2;
stroke-dasharray: 422, 0;
transition-delay: none;
}
}
.btn-1:hover {
font-weight: 900;
letter-spacing: 2px;
rect {
stroke-width: 5;
stroke-dasharray: 15, 310;
stroke-dashoffset: 48;
transition: all 1.35s cubic-bezier(0.19, 1, 0.22, 1);
}
}
.btn-1.color-green:hover {
color: green;
rect {
stroke: green;
}
}
.btn-1.color-blue:hover {
color: blue;
rect {
stroke: blue;
}
}
Hiệu ứng thêm đường kẻ và đổi màu button
Để áp dụng hiệu ứng này thì bạn cần hiểu và biết cách sử dụng :before và :after một cách thành thạo.
Ví dụ minh họa:
HTML
<div id="main">
<div class="container">
<div class="row">
<div class="block col-md-2">
<a href="#" class="btn btn-2 color-green">
Hover
</a>
</div>
<div class="block col-md-2">
<a href="#" class="btn btn-2 color-blue">
Hover
</a>
</div>
</div>
</div>
</div>
CSS
.btn-2 {
letter-spacing: 0;
}
.btn-2.color-green:hover,
.btn-2.color-green:active {
color: green;
}
.btn-2.color-blue:hover,
.btn-2.color-blue:active {
color: blue;
}
.btn-2:hover,
.btn-2:active {
letter-spacing: 5px;
}
.btn-2:after,
.btn-2:before {
backface-visibility: hidden;
border: 1px solid rgba(#fff, 0);
bottom: 0px;
content: " ";
display: block;
margin: 0 auto;
position: relative;
transition: all 280ms ease-in-out;
width: 0;
opacity: 0;
}
.btn-2.color-green:after,
.btn-2.color-green:before {
border: 1px solid green;
}
.btn-2.color-blue:after,
.btn-2.color-blue:before {
border: 1px solid blue;
}
.btn-2:hover:after,
.btn-2:hover:before {
backface-visibility: hidden;
transition: width 350ms ease-in-out;
width: 70%;
opacity: 1;
}
- Hiệu ứng mix-blend-mode button bằng CSS
Hiệu ứng này giúp các nút bấm có sự phối hợp độc đáo giữa màu sắc, hình khối và con chữ. Đây là một hiệu ứng khá đơn giản nhưng mới mẻ.
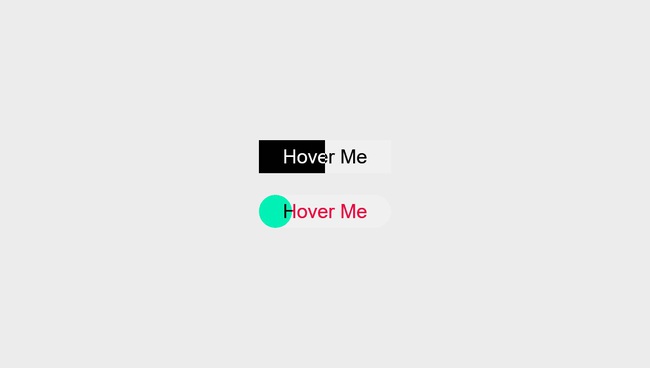
Thao tác như sau:
HTML
.container
button.btn
span.btn-text Hover Me
button.btn.rounded
span.text-green Hover Me
CSS
body,html{
height: 100%;
}
body {
font-family: "Lato", sans-serif;
color: #111;
display: flex;
flex-direction: row;
align-items: center;
align-content: center;
justify-content: center;
background-color: #ECECEC;
}
.container {
width: auto;
display: flex;
flex-direction: column;
//border: 2px solid black;
}
.btn{
margin: 20px auto;
border: none;
padding: 10px 44px;
font-size: 36px;
position: relative;
&::before{
transition: all 0.85s cubic-bezier(0.68, -0.55, 0.265, 1.55);
content: '';
width: 50%;
height: 100%;
background: black;
position: absolute;
top: 0;
left: 0;
}
& .btn-text{
color: white;
// check out mdn docs for different types of blend modes.
mix-blend-mode: difference;
}
&:hover{
&::before{
background: black;
width: 100%;
}
}
//rounded btn styles
&.rounded{
border-radius:50px;
& .text-green{
color:#00F0B5;
mix-blend-mode: difference;
}
&::before{
border-radius: 50px;
width: 25%;
background: #00F0B5;
}
&:hover{
&::before{
background: #00F0B5;
width: 100%;
}
}
}
}
Tổng kết
Hãy chia sẻ và đóng góp thêm những hiệu ứng Hover thú vị khác các bạn nhé. Hy vọng rằng bạn sẽ luôn đồng hành và ủng hộ những bài viết khác.
Theo Bizfly Cloud tổng hợp
>> Có thể bạn quan tâm: Mẹo cải thiện hiệu suất CSS và JS animation không thể bỏ qua
